REVIEW · HOBART
Hobart Hop-On Hop-Off Bus & kunanyi/Mt Wellington Tour
Book on Viator →Operated by Red Decker Company · Bookable on Viator
A mountain viewpoint plus a city loop in one ticket. That combo is the reason this works so well. You get 48 hours of unlimited hop-on hop-off bus rides and an all-day kunanyi/Mt Wellington Explorer Pass, so you can move at your pace.
I like that the buses are set up for real sightseeing: you can jump off at key areas, wander, and catch the next one when you’re ready. I also like the practical perks, like on-board commentary in your language, air-conditioning, and WiFi.
One thing to watch: the day can be weather-dependent on kunanyi/Mt Wellington, and the end-of-day last bus timing can catch you out if you’re slow getting back.
In This Review
- Key highlights worth planning around
- What You’re Really Buying for $60.97
- How the City Loop and Mt Wellington Pass Work Together
- The 90-Minute Hobart City Loop: where each stop actually helps
- Tasmanian Travel & Information Centre (start/finish)
- Brooke Street Pier
- Princes Wharf area (30 Morrison St)
- CSIRO area (3 Castray Esplanade)
- Hampden Rd / Colville St corner (34 Hampden Rd)
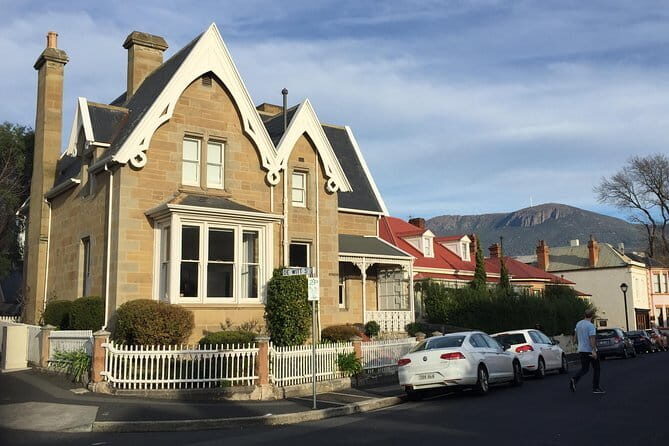
- De Witt St / Cromwell St area (22 De Witt St)
- St Georges Terrace / Sandy Bay Rd area (64 St Georges Terrace)
- Wrest Point (outside main entrance)
- Sandy Bay Rd / Queen St corner (143 Sandy Bay Rd)
- Cascade Brewery Bar
- Cascade Rd / McRobies Rd corner (123 Cascade Rd)
- Macquarie St / Weld St corner (409 Macquarie St)
- Village Cinemas Hobart (near Barrack St intersection)
- Collins St / Murray St corner (119 Collins St)
- Maritime Museum Tasmania (this one matters)
- Brisbane St / Campbell St corner (101 Campbell St)
- University Rose Gardens (opposite ABC building area)
- Royal Tasmanian Botanical Gardens (outside main entrance)
- Zero Davey Boutique Apartments (Davey St / Hunter St corner)
- kunanyi/Mt Wellington: the stops, the viewpoint payoff, and the weather reality
- Getting onto the mountain bus: where it starts
- What the viewpoint feels like when it’s clear
- If conditions turn
- A practical caution: timing and motion sickness
- Photo time and “how much to walk”
- Summit comfort: plan for no café
- Commentary, WiFi, and why the driver can change your whole day
- Timing tips: avoid the last-bus stress
- Where the city loop shines for photos (and where it can be tricky)
- Value Check: is $60.97 worth it for your style of travel?
- Who Should Book This (and who might not love it)
- Should you book this Hobart Hop-On Hop-Off + kunanyi/Mt Wellington Tour?
- FAQ
- How long is the city loop portion?
- Does the ticket include kunanyi/Mt Wellington?
- Is food and drink included?
- Are entrance fees included?
- Is there WiFi on the buses?
- Are service animals allowed?
- Can I cancel for a full refund?
Key highlights worth planning around

- 48-hour unlimited access to the Red Decker city loop means you can redo stops without stress.
- Separate kunanyi/Mt Wellington Explorer Pass gives you all-day flexibility with English commentary.
- On-board commentary in your language helps you connect the dots while you ride.
- Real orientation value: a 90-minute circuit that covers major Hobart areas so you don’t waste your first day.
- Wellington Park bushwalking map is included, which makes the mountain stop more useful.
What You’re Really Buying for $60.97
At $60.97 per person, this ticket isn’t just “a bus ride.” You’re paying for time-saving routing plus flexibility.
You get a 48-hour Red Decker Hop-On Hop-Off City Loop Ticket plus a kunanyi/Mt Wellington Explorer Pass (valid all day, English commentary). On top of that, you’ll receive a complimentary copy of Red Decker’s The Official Sightseeing Guide to Hobart and a Wellington Park bushwalking map. Air-conditioning and WiFi on board are included, too.
The value is strongest when you want to see a lot without figuring out parking. One review even called it a solid alternative when parking was stressful. If you’re happy to stay flexible and use the bus like a moving base, this is priced for the way most people actually travel: grab sights, take photos, hop off for a walk, then return later.
You can also read our reviews of more tours and experiences in Hobart.

How the City Loop and Mt Wellington Pass Work Together
Think of this as two linked pieces.
First, you have the city loop, which is designed as a 90-minute route with stops that make sense for first-time orientation. You start and finish at the Tasmanian Travel & Information Centre, then pass through major areas like Brooke Street Pier, Princes Wharf, the CSIRO area, and the Royal Tasmanian Botanical Gardens area. You can hop on/off as often as you want during your 48-hour access window.
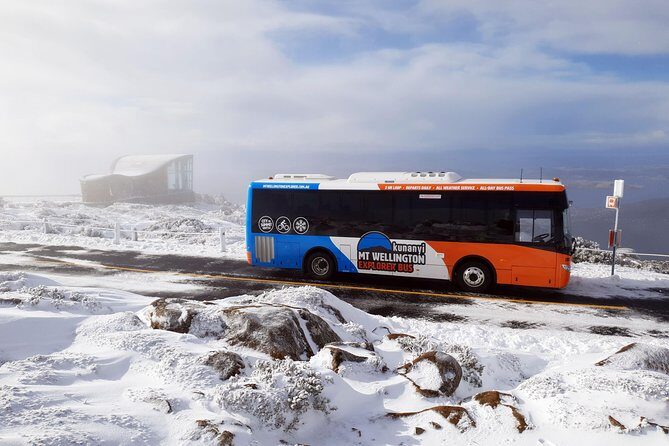
Second, you have the kunanyi/Mt Wellington Explorer Pass. That part is the reason many people book: Wellington Park gives you that classic Hobart “from the top” view. The bus also stops at useful points for exploring along the way, like Fern Tree Park, The Springs, the Chalet stop, Big Bend, and Pinnacle Road stops.
If you’re planning your day, I’d treat the city loop as your daytime scaffolding and kunanyi as the high-reward segment. Many of the stops on the city loop are great in wind, sun, or light rain, but kunanyi depends more on weather.
The 90-Minute Hobart City Loop: where each stop actually helps
The city loop is where you get your bearings fast, and where you can build a sightseeing “route” without committing to a car.
Here’s how to use the stops, with notes on what matters at each one:
Tasmanian Travel & Information Centre (start/finish)
This is your hub. If you’re the type who likes to check your plan mid-day, having a clear start/finish point is a relief. It’s also the place to return to if you’re unsure which stop will work best later.
One practical heads-up: an end-of-day timing issue came up for someone who missed the final return bus and had to use an Uber. So if you’re using the loop for late hours, plan to be back earlier than you think.
Brooke Street Pier
This is a key connector stop, close to waterfront activities. It’s also where the MONA Ferry Terminal ties in, meaning it’s useful if you want to pair the bus with ferry plans or simply enjoy the harbor vibe.


Princes Wharf area (30 Morrison St)
You’re near the waterfront and the Port-side atmosphere. This stop is a good choice if you want maritime views without locking yourself into a long walk.
CSIRO area (3 Castray Esplanade)
This one feels “practical” more than flashy. It’s helpful because it keeps the loop moving through the city in a way that lets you reach nearby attractions without backtracking.
Hampden Rd / Colville St corner (34 Hampden Rd)
This is another anchor that helps you shape your day geographically. If you’re planning a walk that starts inland, this kind of stop keeps the bus from forcing you to start at one extreme.
De Witt St / Cromwell St area (22 De Witt St)
Use this when you’re heading toward residential streets and smaller lanes rather than sticking to the main waterfront.
St Georges Terrace / Sandy Bay Rd area (64 St Georges Terrace)
This can work well if you want to extend your sightseeing beyond downtown. It’s also a logical place to hop off if your next plan is in the broader Sandy Bay direction.
Wrest Point (outside main entrance)
If you’re curious about iconic Hobart landmarks, this is a convenient drop-off. It’s a straightforward “get off here and go see” stop.
Sandy Bay Rd / Queen St corner (143 Sandy Bay Rd)
This is useful for connecting to local streets and shops without having to ride to the very center every time.
Cascade Brewery Bar
If you like a break mid-day (even just for a quick look), having this as a bus stop makes it easy. It also gives you an option that doesn’t rely on outdoor weather.
Cascade Rd / McRobies Rd corner (123 Cascade Rd)
This supports the loop’s spread into the Cascade direction. It’s worth using if you want to spend time away from the densest downtown area.
Macquarie St / Weld St corner (409 Macquarie St)
This is another downtown-adjacent stop that can reduce the hassle of “I’m close but can I walk?” You can hop off and decide from there.
Village Cinemas Hobart (near Barrack St intersection)
This is great as a “plan B” stop. If weather or crowds slow you down, you can head somewhere indoor and still stay on schedule.
Collins St / Murray St corner (119 Collins St)
This is the kind of central stop that lets you reach shops, cafés, and city walks without a long detour.
Maritime Museum Tasmania (this one matters)
If you care about Hobart’s maritime story, this is the stop to target. It’s one of the clearer reasons the loop includes this section: you can hop off and focus on a museum without losing your ride window.
Brisbane St / Campbell St corner (101 Campbell St)
This helps you reach another part of town without needing to guess which streets will connect best.
University Rose Gardens (opposite ABC building area)
This stop is ideal for a calmer break where you can walk and reset between more structured sights. It’s also a good “photo and stretch” option.
Royal Tasmanian Botanical Gardens (outside main entrance)
If you love gardens, this is one of your best city-loop uses. The big win is simple: you’re not making a special transit plan. You can hop off, wander, then hop back on when you’re ready.
Zero Davey Boutique Apartments (Davey St / Hunter St corner)
This stop adds flexibility for lodging areas and nearby walks. Even if you’re not staying there, it helps keep the loop practical across different parts of the city.
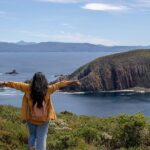
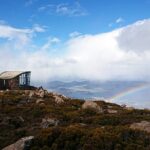
kunanyi/Mt Wellington: the stops, the viewpoint payoff, and the weather reality

The kunanyi/Mt Wellington part is the tour’s “wow factor,” but it’s also the most weather-sensitive.
Getting onto the mountain bus: where it starts
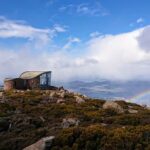
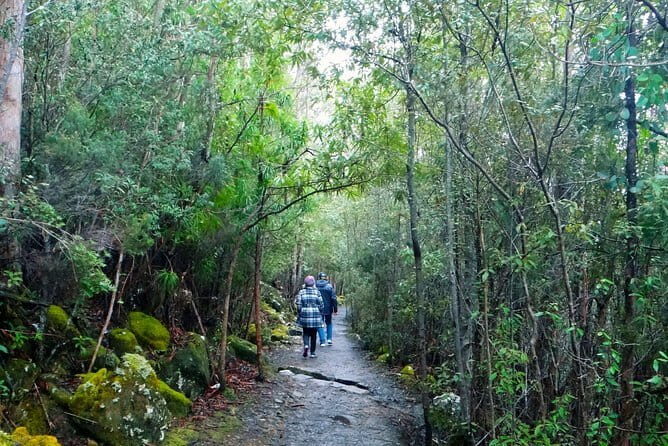
You’ll connect through stops that include Brooke Street Pier (as a pickup point), then move through areas like the Hydro Tasmania Building and the Fern Tree Park bus stop. After that, the route heads toward the mountain areas with stops like North-South Track (The Springs) and Wellington Park (the Chalet stop).
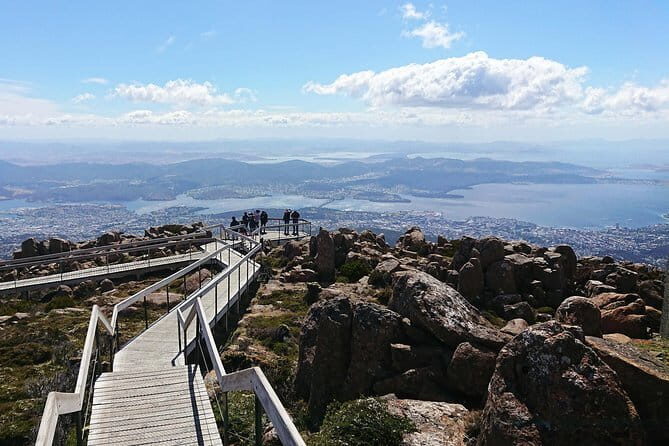
From there you reach Pinnacle Road stops including Big Bend and Pinnacle. Those are the kind of points where you can find viewpoints or start walking options.
What the viewpoint feels like when it’s clear
When the day is clear, the payoff is big. One guide-led experience highlighted how views were spectacular when the weather cooperated. Even when it’s cold, the bus experience itself can be comfortable, and one driver (Greg) was praised for keeping the bus warm when temperatures at the top were around zero degrees.
If conditions turn
If it’s rainy or cloudy, the mountain trip can feel less worth it. That’s not a knock on the route; it’s just physics. You’ll still ride and you can still walk if you have gear, but the view is the point.
A practical caution: timing and motion sickness
The mountain road can be narrow. If you’re sensitive to motion, I’d sit toward the front. That small change can make a noticeable difference when the road curves.
Photo time and “how much to walk”
There’s a real trade-off on any mountain stop: to get photos, you usually need to get off and move around a bit. If the weather makes that harder, you may end up spending more time waiting for better conditions—or simply taking photos from whichever stop gives you safe access.
Also, one person wanted a heads-up about trail closures before getting off. If you plan to walk, treat the included bushwalking map as your baseline, and be alert for any on-the-spot updates at the stop.
Summit comfort: plan for no café
A note that may matter to you: the top stop doesn’t come with a guaranteed café experience. Someone suggested a café at the summit would help. So if you want a warm drink or a snack, I’d plan around that and bring what you need.
Commentary, WiFi, and why the driver can change your whole day

This ticket includes on-board commentary in your language on the city loop, and English commentary on the kunanyi pass. That matters more than it sounds. When you can follow what you’re seeing, you stop feeling like you’re just traveling from stop to stop.
Air-conditioning and WiFi on board are also practical for planning. If you’re hopping between sections, being able to check where you are and adjust your next move is useful.
The human factor shows up too. Multiple notes praised driver Greg for good history and organization. One account emphasized how he kept the bus warm and stayed informative at the mountain. If your goal is to learn a bit without reading a pile of brochures, that kind of guided energy is a real plus.
Timing tips: avoid the last-bus stress
The biggest “gotcha” isn’t the route itself. It’s the day wrap-up.
One review mentioned the last bus from the Tourist Centre being too early (around 3pm), leading to a return by Uber. Another mentioned frustration with finding specific bus stops and missing a bus, then waiting longer than expected.
So here’s how I’d protect your plan:
- Build a little buffer before you expect the final return.
- Use the official sightseeing guide as your reference for stops and what to prioritize.
- If you’re unfamiliar with the area, take a moment at the beginning of the day to compare stop names on signage with what you see on your map.
Also, keep in mind that weather can slow down hopping and photographing. If you know it’s windy on the waterfront or on the mountain road, decide what’s most important, then move efficiently.
Where the city loop shines for photos (and where it can be tricky)
If photos matter, you’ll like that you can hop off to get viewpoints. But there’s a practical friction: some people find it easier to get decent shots by stepping on and off, and that can be harder when weather limits access.
On a rainy or windy day, I recommend you choose fewer stops with more time at each one. That way you don’t lose the best light—or your momentum—trying to catch buses while the conditions change.
If you’re traveling with limited time, prioritize the stops that connect you to iconic areas: Maritime Museum Tasmania, Royal Tasmanian Botanical Gardens, and the waterfront at Brooke Street Pier. Those are the ones that naturally lead into meaningful time on foot.
Value Check: is $60.97 worth it for your style of travel?
For $60.97, you’re getting:
- 48 hours of city looping without paying again
- All-day kunanyi/Mt Wellington access
- On-board WiFi and air-conditioning
- A sightseeing guide plus a Wellington Park bushwalking map
- Commentary in your language (city loop) and English (mountain)
What’s not included is important: entrance fees and food and drinks. So if you plan to pay for museums, you’ll need to budget separately.
In return, you’re likely saving money and energy versus piecing together multiple taxis or spending time parking. One person even said the option was helpful because finding parking and staying longer than the tour duration created stress—and in their case, it led to a fine. If you want to avoid parking headaches, this bus setup is a strong fit.
If you already know Hobart well and you’re comfortable driving, you might feel less urgency. But for a first visit, or for travelers who want maximum flexibility with minimum planning, the ticket price tends to make sense.
Who Should Book This (and who might not love it)
You’ll probably enjoy this most if:
- You want a first-day orientation plus a second chance over 48 hours
- You like learning as you go with on-board commentary
- You want mountain views without figuring out transport timing alone
- You value comfort perks like air-conditioning and WiFi
You might hesitate if:
- You get motion sickness easily and you prefer smoother, shorter roads
- You rely on late-day departures and don’t want to gamble on last-bus timing
- You’re expecting the kunanyi experience to be equally strong in poor visibility (when it’s cloudy, the view payoff drops)
Should you book this Hobart Hop-On Hop-Off + kunanyi/Mt Wellington Tour?
If you want a smart way to see Hobart fast—and still have time to wander at your own pace—I’d book it. The 48-hour city loop makes it forgiving, and the kunanyi/Mt Wellington Explorer Pass turns a normal day into a real highlight, especially on a clear day.
Before you click confirm, do two quick checks: plan your return with the possibility of an early last bus, and be honest about how weather affects mountain views for you. If you can handle that, this ticket is an efficient, well-supported way to cover the city and reach the top.
FAQ
How long is the city loop portion?
The hop-on hop-off city loop route is about 90 minutes per circuit, and you can use it with 48 hours of unlimited access.
Does the ticket include kunanyi/Mt Wellington?
Yes. You get a separate kunanyi/Mt Wellington Explorer Pass that is valid all day, with English commentary.
Is food and drink included?
No. Food and drinks are not included.
Are entrance fees included?
No. Entrance fees are not included.
Is there WiFi on the buses?
Yes. WiFi is available on board.
Are service animals allowed?
Yes, service animals are allowed.
Can I cancel for a full refund?
Yes. You can cancel up to 24 hours in advance for a full refund. If you cancel less than 24 hours before the start time, the amount paid is not refunded.