REVIEW · HOBART
kunanyi/Mt Wellington Tour and MONA Admission
Book on Viator →Operated by Experience Tasmania Gray Line Day Tours · Bookable on Viator
Two iconic Hobart stops in one guided day. You’ll ride up kunanyi/Mt Wellington to learn the mountain’s ecosystems, then float over to MONA for art and history inside a striking riverside building. It’s a mix of crisp air, real local context, and a museum that can feel weird in the best way.
I love that this tour is properly guided, with a driver-guide who talks nonstop and keeps the day moving without feeling chaotic. I also love that hotel pickup and MONA entry are included, along with the return ferry ticket, so you’re not chasing costs or schedules after you land in Hobart.
One drawback to plan for: summit weather can be harsh and fast-changing. Even when Hobart town is calm, the top can be cold, windy, and sometimes cloudy enough to hide the view.
In This Review
- Key Things To Know Before You Go
- Kunanyi/Mt Wellington: Cold-Air Views and Ecosystem Lessons
- Driver-Guide Commentary on the Way Up (and Why It Helps)
- Cascade Gardens and the Cascades Female Factory Exterior: A Short History Stop
- Derwent River Ferry to MONA: Architecture, Art, and Time to Wander
- The Day’s Timing: Start at Mona Brooke Ferry Terminal, End at Brooke Street Pier
- Is $101.85 Good Value for Mt Wellington and MONA?
- Weather-Proofing: When Clouds Steal the View, Here’s What Still Works
- Who This Tour Fits Best (and Who Should Rethink It)
- Should You Book This Mt Wellington and MONA Tour?
- FAQ
- What time does the tour start?
- Where do I meet for the tour?
- Is hotel pickup included?
- What is included with MONA?
- How long is spent at Mount Wellington?
- How long is the MONA visit?
- Are Cascade Gardens tickets included?
- Is lunch included?
- How does the tour end?
- What happens if weather is poor?
Key Things To Know Before You Go
- Alpine learning, not just lookouts: you get eco system talk as the vehicle climbs
- Time at the summit is short but meaningful: enough for the view, a walk or two, and photos
- MONA is built for a long wander: you get a solid block of museum time (not a quick peek)
- Ferry time is part of the experience: the Derwent River crossing sets the mood for MONA
- Cold-weather packing matters: layers, gloves, and a windproof layer are worth it
- You’ll end with a ferry, not a hotel drop-off: plan to stay near the end point area
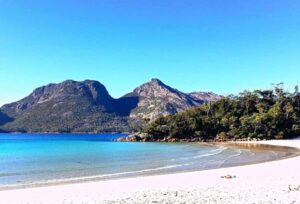
Kunanyi/Mt Wellington: Cold-Air Views and Ecosystem Lessons
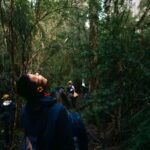
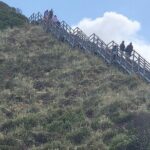
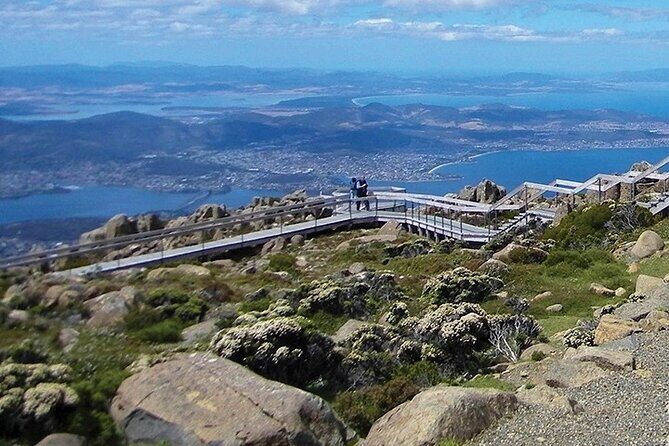
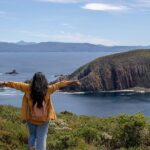
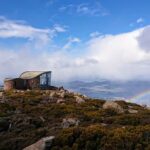
Mt Wellington is famous for two things: dramatic air and dramatic weather. The summit environment is harsher than what you feel in Hobart, so the tour starts by easing you into it—how the mountain changes as you climb, and why the plants and terrain behave the way they do.
As you ascend, you’ll pass by standout geological features, including the massive Organ Pipes rock formation. This is one of those moments where the guide’s story makes the scenery click—you’re not just seeing rocks, you’re getting context for why this place feels so different from street level.
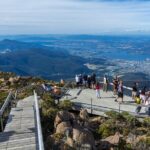
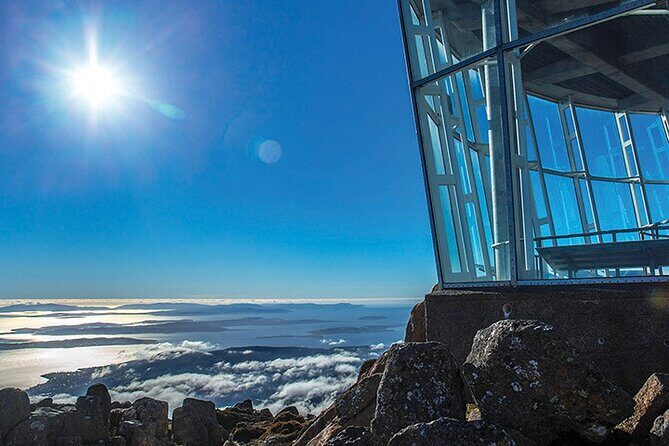
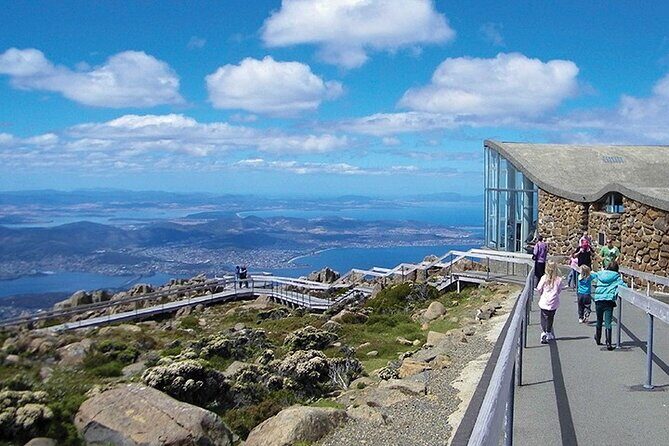
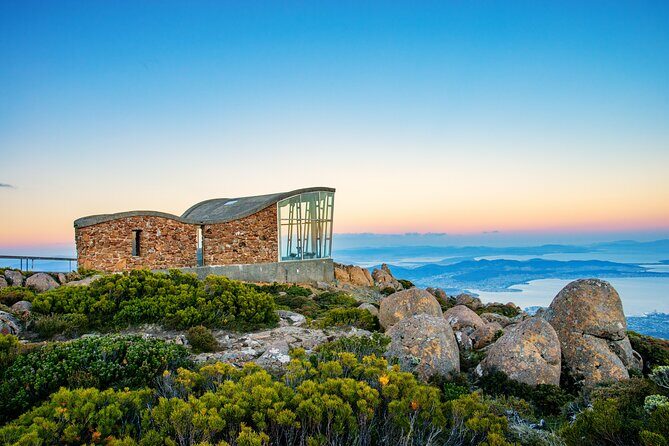
The mountain part of your day is designed around practical timing. You’ll have about 30 minutes up top to enjoy the views, the observatory building, and short walking options. If the clouds part, you’ll see Hobart laid out below. If clouds roll in, you’ll still experience the mountain’s mood—wind, mist, and that clean high-air feel people come for.
You can also read our reviews of more tours and experiences in Hobart.

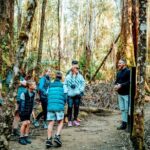
Driver-Guide Commentary on the Way Up (and Why It Helps)
This isn’t a hop-on hop-off ride. The day is escorted by a driver-guide who provides continuous commentary, so you’re always hearing what you’re passing and why it matters.
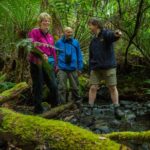
That matters on Mt Wellington because so much of the interest is subtle. The tour’s eco system focus gives you a framework for what you’re looking at—alpine conditions, how the area feels different with elevation, and how weather can make the entire experience feel like a different world.
It also helps for city context once you loop back in. In the past, guides like Mark have been praised for clear instructions plus lots of information and even jokes that keep people engaged during the drive. Others, like Dave, have been noted for giving steady background on Hobart and tying the day together so it doesn’t feel like two separate outings.
Quick reality check: if you’re sensitive to audio, it’s still a bus day. One guest noted microphone issues for part of the trip. If you’re the type who relies on every word, consider positioning yourself where you can hear well.
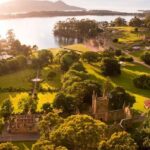
Cascade Gardens and the Cascades Female Factory Exterior: A Short History Stop
After the summit, you slow down at Cascade Gardens. This is a compact but meaningful break, with a garden setting that’s historic in its own right and dates back to 1827.
You’ll also see the remains connected to the Cascades Female Factory, once a site tied to convict women. The time here is brief (think a quick stroll and a photo window), and the focus is on the exterior view plus the driver-guide’s historical context rather than an in-depth museum style visit.
This stop is a nice counterbalance to Mt Wellington. The mountain is all air and altitude. Cascade Gardens is about pace—walkable paths, old stonework, and a chance to reset before you head to MONA’s more intense atmosphere.
One practical point: this stop runs on time. If you like slow photography and long garden wandering, you might feel a little rushed with only about 15 minutes here. Still, it’s a good fit for travelers who want variety without turning the day into a marathon.
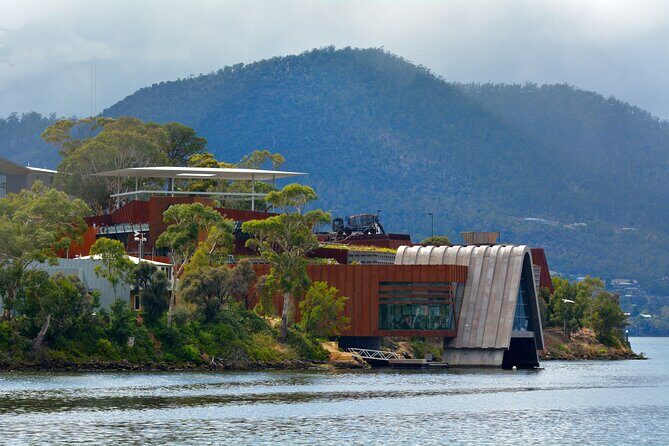
Derwent River Ferry to MONA: Architecture, Art, and Time to Wander
MONA is the swing of the pendulum. Where Mt Wellington is about nature and weather, MONA leans into modern art, controversy, and big-scale ideas—along with some unexpected artifacts like Egyptian mummies (and yes, that mix is part of the appeal).
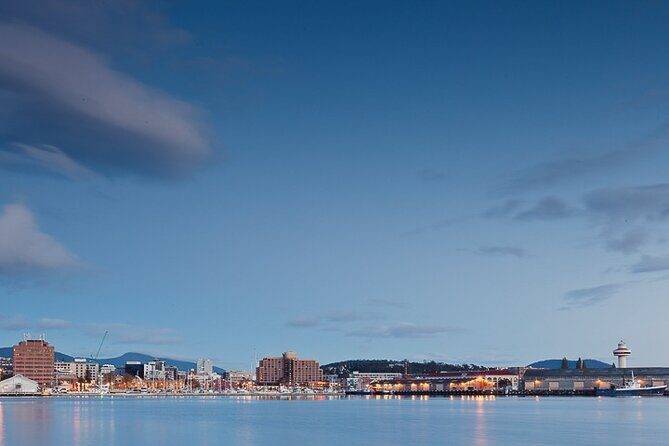
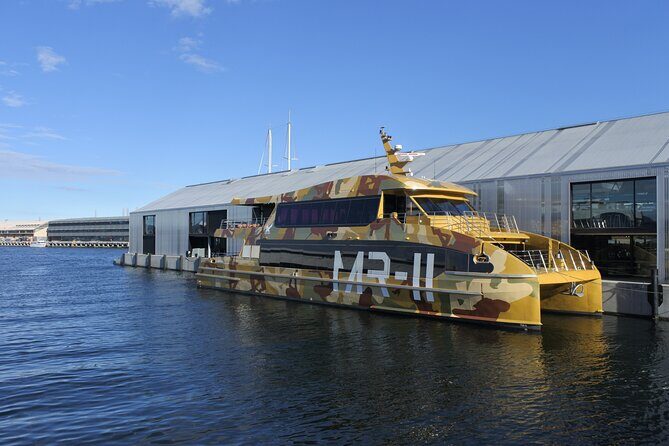
You’ll arrive to MONA after a scenic cruise along the Derwent River, which is a great mood-setter. Even if you’re not a big museum person, the ferry ride helps you transition: you’re moving from outdoors into a space designed to feel like a world of its own. The building itself has a distinctive presence, and the arrival moment is part of the experience.
Your MONA time is about 4 hours with admission included. That’s enough to do more than just skim a few galleries. You can take your time, follow what interests you, and step away from what doesn’t.
Here’s the honest part: MONA’s art is a love-it-or-hate-it situation. Some people find it fascinating and memorable; others find the tone too strange or too much to follow. If you’re the type who wants everything explained perfectly and neatly, you might want to set expectations now: MONA tends to be more about experience and provocation than tidy curating.
Also plan your body for movement. Some guests have pointed out that the interior layout can involve lots of stair steps (including the famous 99-step idea). If you’re mobility-limited, it’s worth considering ahead of time that the museum experience may require stair navigation rather than only level walkways.
Food and drink are available on-site, and the ferry ride can also have bar-style options. Lunch itself isn’t included on the tour, so this is where you’ll want to budget time to eat without stressing.
The Day’s Timing: Start at Mona Brooke Ferry Terminal, End at Brooke Street Pier
This is a one-day combo that runs long enough to feel substantial but not long enough to mess up your whole Hobart stay. Expect around 7.5 hours total.
You’ll start at Mona Brooke Ferry Terminal on Franklin Wharf around 9:00 am. Even if you have hotel pickup, it’s still a start-point day centered on the wharf and ferry system. Pickup is offered, but the tour doesn’t provide hotel drop-off at the end.
The day ends at Brooke Street Pier at the same Franklin Wharf area. The key detail is that your return is via ferry, with the return ferry ticket included. So you’re planning your evening around that pier area, not around getting dropped back at your hotel.
If you’re the kind of traveler who likes flexibility, here’s a useful note from real experience: one guest said they could change the return ferry time to suit their plans. That’s not something to assume for every departure, but it’s a good hint that you may have some wiggle room once you’re at MONA.

Is $101.85 Good Value for Mt Wellington and MONA?
At $101.85 per person, this tour isn’t a budget bargain, but it’s also not a splurge day pretending to be cheap. The value comes from what you’re bundling together.
You’re getting:
- Hotel pickup (so you’re not arranging your own transport)
- Air-conditioned vehicle
- Driver-guide escort
- MONA admission
- Return ferry ticket
On top of that, Mt Wellington and Cascade Gardens admission tickets are listed as free, which keeps the “extra fees” feeling low.
The two things that are not included are lunch and the Female Factory Historic Site admission (your stop here is described as an exterior viewing time). So your day cost won’t stay exactly the same if you want a full meal at MONA, but you’re at least not adding another major sightseeing ticket.
If you were doing this independently, you’d still pay for transport, MONA entry, and get yourself to the ferry. This tour bundles those pieces with a timed schedule and guided context, which is exactly where group tours earn their keep: they remove friction.
Weather-Proofing: When Clouds Steal the View, Here’s What Still Works
Mt Wellington weather is unpredictable by design. You can wake up to clear skies in town and hit summit clouds, or you can get wind and cold even when it feels mild down in Hobart.
So pack like the summit will be colder and windier than you expect. At least:
- A windproof outer layer
- Gloves and something for your face
- Layers you can peel on the bus if you get warm
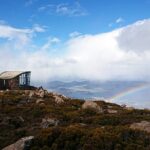
Even if the view is blocked, the trip can still be worth it. Some guests have described a surreal misty, ice-covered feeling when visibility was limited. In other words, the mountain can still deliver an experience, even when it doesn’t deliver the classic postcard panorama.
One more planning move: if you’re coming in a season where you can’t afford a ruined day, consider having a second half-day or indoor plan in your back pocket. This tour is described as requiring good weather, and it can be cancelled or adjusted if weather interferes. Booking with flexibility is how you reduce stress.
Who This Tour Fits Best (and Who Should Rethink It)
This tour is a strong fit if you want an efficient Hobart day that mixes nature and culture without you having to coordinate transport and timing.
You’ll likely love it if you:
- Want a guided explanation on Mt Wellington’s environment, not just quick photos
- Appreciate MONA’s mix of edgy contemporary art and older artifacts
- Prefer having entry and ferry logistics handled for you
- Like a full day plan that starts early and ends back at the pier area
You might rethink it if:
- You’re sensitive to cold and wind and don’t want to dress for it
- You need lots of time to roam freely at each stop (the garden stop is short, and summit time is limited)
- You don’t like museums with strong opinions and experimental layouts
Should You Book This Mt Wellington and MONA Tour?
I’d book it if you want one guided day that hits Hobart’s two biggest “first-time” icons: the mountain viewpoint plus MONA’s distinctive museum experience. The included ferry and MONA entry make it feel like a real package, and the driver-guide format adds value on the mountain where weather and altitude change everything.
Skip it (or choose another plan) if your top priority is guaranteed views, long unstructured time, or a calm museum day with minimal stairs and minimal surprise. For most people, though, the payoff is simple: you get a memorable mountain morning and an unforgettable museum afternoon, all tied together by transport that removes work from your day.
FAQ
What time does the tour start?
The tour starts at 9:00 am.
Where do I meet for the tour?
You meet at Mona Brooke Ferry Terminal, Franklin Whrf, Hobart TAS 7000.
Is hotel pickup included?
Yes, hotel pickup is included.
What is included with MONA?
MONA entry is included, plus a return ferry ticket.
How long is spent at Mount Wellington?
Stop time at Mount Wellington is about 1 hour 15 minutes, with up to about 30 minutes for summit viewing and short walks.
How long is the MONA visit?
The MONA stop is about 4 hours.
Are Cascade Gardens tickets included?
Cascade Gardens admission is listed as free.
Is lunch included?
No, lunch is not included.
How does the tour end?
The tour ends at Brooke Street Pier, 12 Franklin Whrf, and the tour concludes with the ferry. Hotel drop-off is not available.
What happens if weather is poor?
This experience requires good weather. If it’s canceled due to poor weather, you’ll be offered a different date or a full refund.
![Cascades Female Factory Historic Site [official] - The tour format: what happens during the 2 to 3 hours](https://m.hobartdaily.com/wp-content/uploads/cascades-female-factory-historic-site-official-300x200.jpg)