REVIEW · HOBART
Shore Excursion: Hobart Wanderer
Book on GetYourGuide →Operated by iWander Tasmania · Bookable on GetYourGuide
From Mt. Wellington to Bonorong, this shore excursion gives you two big wow moments fast—plus a real taste of Hobart. I like how the day starts with a short Tasmanian history briefing and then pivots to hands-on wildlife, including the chance to feed kangaroos and see Tasmanian devils up close. One heads-up: the ride can be tight and, on some vans, warm—so plan for comfort issues on long stretches.
What makes it work for cruise travelers is the timing logic. You’re picked up at the cruise terminal, your guide keeps an eye on your ship schedule, and the tour can be shortened if departure times change. That means you’re not stuck wondering if you’ll make it back to port on time.
In This Review
- Why this is a strong first taste of Tasmania
- Key highlights worth planning around
- One day that actually feels like Tasmania
- Starting at 9am: how the cruise-terminal pickup feels in real life
- Hobart on wheels: a city taste with history context
- Mt. Wellington: the viewpoint stop that anchors the day
- Cool climate vibes and how to stay comfortable
- Bonorong Wildlife Sanctuary: kangaroos and Tasmanian devils up close
- Richmond in about 90 minutes: historic vibes without the overplanning
- Price and value: what you’re paying for at $112
- Small comfort notes that can change your day
- Who should book this excursion (and who might not)
- Should you book Hobart Wanderer?
- FAQ
- How long is the Hobart Wanderer shore excursion?
- What time does the tour start?
- Where do I meet the guide?
- Does the tour include a live guide?
- What stops are included?
- Are food and drinks included?
- What should I bring?
- Are there any rules about what I can bring?
- Is the tour wheelchair accessible?
- What is the cancellation policy?
Why this is a strong first taste of Tasmania

If you’re visiting Tasmania for the first time and you only have one day, I like that this route balances nature, wildlife, and local towns—without feeling like you’re bouncing between totally unrelated stops. It also helps that the guides bring stories along the way, not just directions. The main drawback is that it isn’t set up for wheelchair users, and you’ll want solid walking shoes for viewing stops and wildlife areas.
Key highlights worth planning around
- Mt. Wellington summit views: a true “Tasmania looks like this” payoff, if the weather is clear
- Bonorong Wildlife Sanctuary encounters: kangaroo feeding and Tasmanian devils are the headline moments
- Hobart city tour included: you get city context before you head into the countryside
- Richmond stop (about 90 minutes): a calm historic break with time to wander
- Guide storytelling: drivers like Paul, Peter, and Simon are described as full of helpful, memorable details
- Comfort can vary: air-conditioning and legroom aren’t guaranteed, so dress and pack smart
You can also read our reviews of more tours and experiences in Hobart
One day that actually feels like Tasmania
This is a classic one-day Hobart shore excursion, but it earns its place by doing the hard part for you: it strings together Tasmania’s signature variety in a single schedule. You’ll move from Hobart’s city streets to mountain viewpoints, then into wildlife country, and finish with Richmond—an easy day arc that helps your brain connect the dots between places.
At $112 per person, you’re paying for more than sightseeing stops. You’re funding a live guide, harbor pickup and drop-off, and guided time at multiple locations. Food and drinks aren’t included, so you’ll still want to budget for lunch—but you do get built-in opportunities to buy lunch along the way or bring your own.
If you like tours that feel efficient without being rushed-in-your-face, this one is a solid match. It’s also the kind of excursion that makes you leave with a short list of what you want to explore later—because the day doesn’t try to “solve Tasmania” in eight hours.
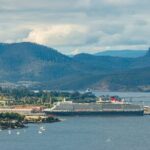
Starting at 9am: how the cruise-terminal pickup feels in real life
Your day begins at 9:00am, with the guide waiting at the MACq02 Terminal (Hobart Cruise Terminal) around 8:50am. The operator uses an iWander Tasmania sign with your name, so you’re not hunting around in crowds.
The bigger point isn’t the sign—it’s the built-in awareness of cruise schedules. Your guide shares pick-up details before the trip, and if the ship is delayed or departure timing changes, the tour can start later or be shortened. That flexibility matters on shore days, because late starts can turn a “perfect plan” into a stress test.
Also note what you’re expected to bring. Comfortable shoes and water are the essentials. It’s simple advice, but it’s the difference between enjoying a viewpoint walk and feeling grumpy about it.
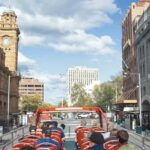
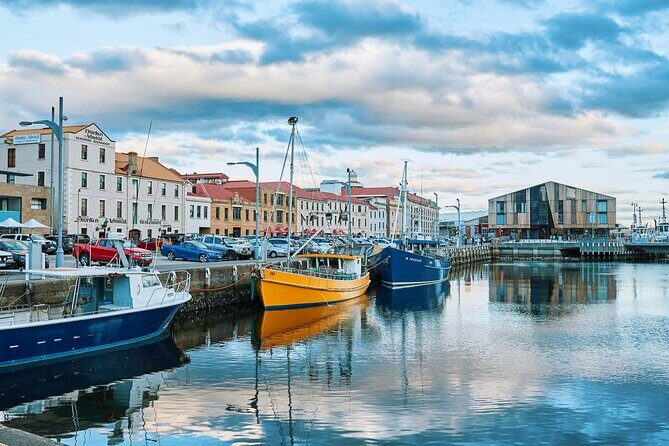
Hobart on wheels: a city taste with history context
Before you head out for the bigger scenery, the guide briefs you on Tasmanian history and then drives through Hobart’s city streets. This is where the tour sets you up for the rest of the day. Even if you only get a brief window of the city, you’ll have a framework for what you’re seeing—why the places matter, and how Hobart relates to the island’s broader story.
In practice, some people say they wanted more of the main sights of Hobart beyond the route up to the mountain. That’s something to keep in mind: this tour is not a full city sightseeing package. The city stop is more of a guided orientation than a deep walk.
Still, if you’ve never been to Tasmania before, that quick history-and-where-we-are context can make the whole day feel smarter. It’s the difference between “we passed buildings” and “I get why this looks the way it does.”
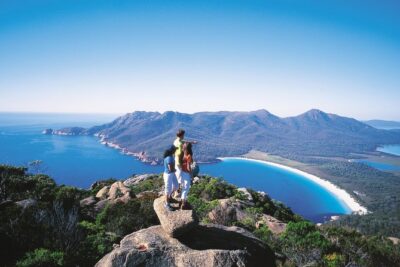
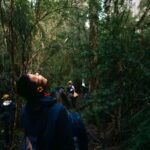
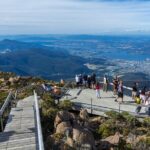
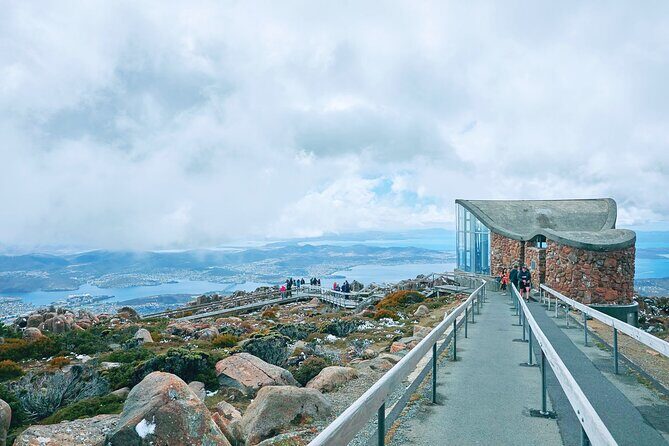
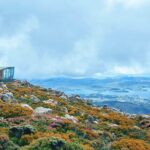
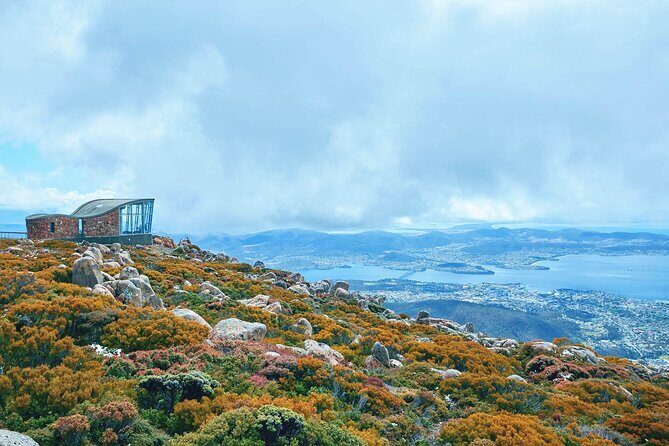
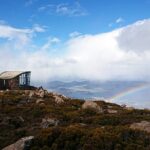
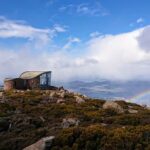
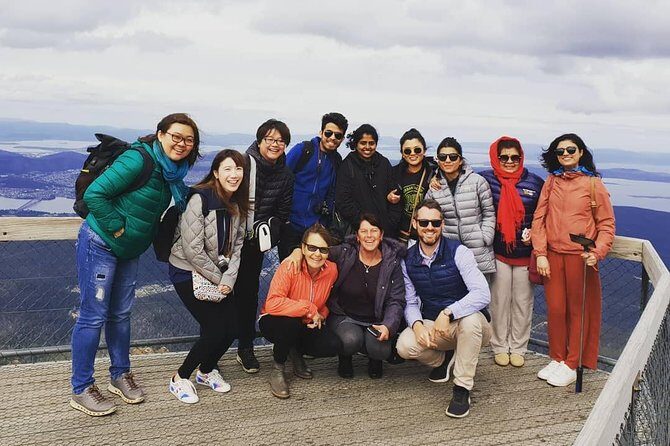
Mt. Wellington: the viewpoint stop that anchors the day

Mt. Wellington is the headline. The tour drives up to the top for breathtaking views, and the entire day starts to make sense once you’ve seen how the island rises and opens up.
What I love about this stop is that it’s not just pretty—it’s a weather education. Many guides talk about how the mountain can feel cooler and windier, even when the lower city feels comfortable. That chilly edge shows up in real-world feedback, where people praised clear skies and strong winds.
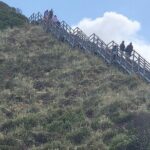
Practical tip: treat Mt. Wellington like the place where layers matter most. Comfortable shoes matter too, because you’ll likely want to stand, look, and move around for photos without feeling stuck.
If you’re the type who likes a scenic payoff early, this is great. If you prefer to save viewpoints for the end of the day, you might wish the order was reversed. But as a cruise shore excursion, starting with the mountain is a smart bet—if weather gets worse, you’ve still banked the main view.

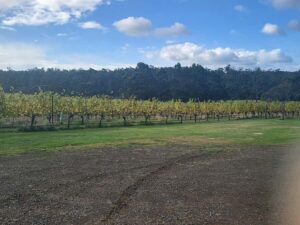
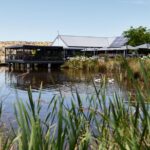
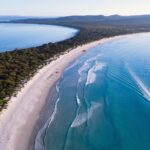
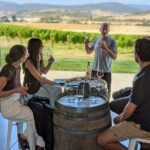
Cool climate vibes and how to stay comfortable
After the mountain, you’ll transition toward the wine region area, where the air feels cooler. That contrast—city warmth, mountain chill, then back into the day’s rhythm—is part of what makes this itinerary feel like Tasmania rather than just a drive.
The comfort catch is simple: the vehicle experience can vary. One common issue in feedback is that some vans aren’t air conditioned, which can make the ride hot on warmer days. Another is legroom on smaller vehicles, which can feel cramped for longer legs.
So plan for the likely scenario:
- wear light layers you can adjust
- keep water handy (you’ll feel better during the wildlife and viewing stops)
- bring a small sun/wind layer even in mild weather
And remember: there’s no alcohol or drugs allowed during the tour, and smoking isn’t permitted.
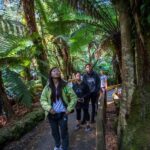
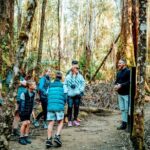
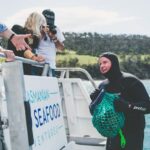
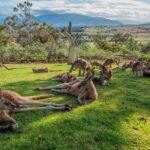
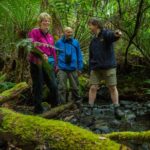
Bonorong Wildlife Sanctuary: kangaroos and Tasmanian devils up close
Bonorong is where the tour earns the most enthusiasm. This isn’t a distant “look at animals behind glass” stop. The big draw is the chance to feed kangaroos and see Tasmanian devils adored (in other words, approached with care and guided by knowledgeable staff).
You should come in with a respectful mindset. Wildlife encounters are exciting, but they work best when you slow down and follow your guide and the sanctuary staff. If you’ve got kids, this stop is often the one they remember most, because it feels hands-on without being chaotic.
From the feedback, people also liked the keepers and found them genuinely interesting and informative. That turns Bonorong from a quick photo moment into an education stop—exactly the kind of value you want on a limited time shore excursion.
One more reason this stop is so valuable: it anchors the day in something uniquely Tasmanian. Mt. Wellington is dramatic, Richmond is historic, but Bonorong is the place that feels like you’re meeting the island’s living personality.
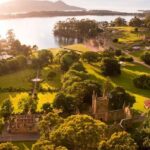
Richmond in about 90 minutes: historic vibes without the overplanning
You’ll finish with Richmond, with feedback noting around 90 minutes there. That’s a comfortable window for browsing, strolling, and soaking up the town feel without racing against the clock too hard.
What I like about ending here is that it’s a breather after wildlife and mountain time. You get to shift gears from active viewing to slower walking and casual exploring. People also appreciated how welcoming staff and locals were, which helps a small town stop feel friendly rather than transactional.
A practical note: this isn’t a shopping-only stop. The goal is atmosphere and light wandering, so if you’re the type who likes photos, quiet streets, and a sense of place, this part of the day works well.
Price and value: what you’re paying for at $112

Let’s talk value plainly. At $112 per person, you’re paying for:
- a live English-speaking guide
- harbor pickup and drop-off
- a full-day routing that includes multiple major stops
Food and drinks aren’t included. That’s normal for tours, but it affects the real total cost. You can bring your own lunch, or you can buy food along the way at stops where lunch is available. Toilets are described as accessible throughout the day, which is one of those unglamorous details that can make or break comfort.
So is it good value? For a cruise shore day, it often is—because you’d otherwise need transport, navigation, and coordination. This tour handles the driving and timing, plus it adds a guide’s narration across several environments.
If you’re already comfortable renting a car and mapping everything yourself, you might find cheaper ways to reach each stop. But you’d still lose the guided context and the “we’ll adjust for cruise timing” support. That’s where you feel the price.
Small comfort notes that can change your day
This is the part where I save you from surprises.
1) Vehicle comfort isn’t guaranteed
Some feedback mentions tight legroom and a lack of air conditioning. If you’re tall or sensitive to cramped seating, consider packing a light layer for cooler stops and plan to wear supportive shoes.
2) Heat and wind are both possible
Mt. Wellington can bring strong chilly wind, but earlier or between stops you can feel warmth depending on the vehicle and weather. Water helps either way.
3) Your lunch strategy matters
Since food and drinks aren’t included, decide early whether you’ll bring lunch or rely on purchase stops. Both options work, but having a plan keeps you from hunting while the clock runs.
4) Wheelchair users should skip this one
This excursion isn’t suitable for wheelchair users, so don’t plan around it.
5) Family note
If you’re traveling with small children, you can contact the supplier for a baby seat, free of charge.
Who should book this excursion (and who might not)
This tour is ideal if you:
- have one day in Hobart and want a fast, structured intro to Tasmania
- care about wildlife encounters more than long museum-style time
- like scenic viewpoints and want the Mt. Wellington payoff built in
- want a guided day with schedule flexibility for cruise departures
It may not be for you if:
- you strongly prefer larger, more spacious vehicles with guaranteed air conditioning
- you expect an extensive stand-alone Hobart city sightseeing day
- you need wheelchair accessibility
Should you book Hobart Wanderer?
I’d book it if you want a well-packaged, one-day Tasmania sampler: Mt. Wellington, Bonorong, and Richmond in a single guided loop, with harbor pickup/drop-off designed for cruise timing. The wildlife stop is the star, and the guides (from Paul to Simon to Peter, based on reported experiences) seem to make the story side of the day genuinely enjoyable.
I’d pause before booking if comfort is your top priority. If you’re prone to feeling cramped or heat-sensitive, bring layers, water, and realistic expectations about vehicle seating.
If your goal is to maximize what you learn and see on limited time, this is a strong pick. If you’re hoping for a relaxed, luxury-feeling ride or a long, deep Hobart city tour, you might want a different style of shore excursion.
FAQ
How long is the Hobart Wanderer shore excursion?
It’s a 1-day tour.
What time does the tour start?
Your tour starts at 9:00am.
Where do I meet the guide?
The guide will be at the MACq02 Terminal (Hobart Cruise Terminal) holding an iWander Tasmania sign with your name on the back, at about 8:50am.
Does the tour include a live guide?
Yes, you’ll have a live guide (English).
What stops are included?
The day includes Mt. Wellington, Bonorong Wildlife Sanctuary, Richmond, and a Hobart city tour.
Are food and drinks included?
No. Food and drinks are not included, but lunch can be purchased along the way, or you can bring your own lunch.
What should I bring?
Bring comfortable shoes and water.
Are there any rules about what I can bring?
Pets are not allowed, and smoking and alcohol/drugs are not allowed.
Is the tour wheelchair accessible?
No, it is not suitable for wheelchair users.
What is the cancellation policy?
You can cancel up to 24 hours in advance for a full refund.