REVIEW · HOBART
Tasmania 5 Day East Coast Tour
Book on Viator →Operated by Fun Tassie Tours · Bookable on Viator
Tasmania looks good from every angle. This five-day East Coast trip strings together Hobart, convict-era sites, Port Arthur, and the Bay of Fires with a small group and lots of tasting stops.
I love how much ground you cover without feeling like cattle. The mix of guided viewpoints (Mount Wellington, Tasman National Park, Port Arthur) plus frequent breaks makes the days feel doable. And yes, the food tastings are a big part of the fun.
The second thing I like is the home base in Hobart. Your first night is at the Mövenpick Hotel, right where you want to be, with check-in available from 1pm and an easy walk to key areas.
One drawback to consider: the schedule is packed. You start at 8:30am and spend plenty of the day in the van, with multiple stops that are more “quick hit” than long hangout time—especially on Day 2 and Day 4.
In This Review
- Key highlights you’ll actually feel
- Why This Hobart to Bay of Fires Route Fits Five Days
- Mövenpick Hobart: A Central Start That Saves You Time
- Day 2 From Hobart Sights to Tasman National Park’s Tasman’s Arch
- Day 3 Port Arthur’s 3-Hour Guided Tour and the Coastline Around It
- Day 4 Bay of Fires, Oysters in St Helens, and the Robotic Dairy Stop
- Day 5 Launceston: A Free Morning to Reset
- Price and Value: What $1,574.35 Buys You Here
- Who This Tour Suits Best (and Who Might Want Something Different)
- A Few Practical Tips Before You Go
- Should You Book This 5-Day East Coast Tour?
- FAQ
- What time does the tour start?
- Is pickup offered?
- How big is the group?
- What’s included for meals?
- What tastings are included?
- Are entry fees and park passes included?
- What is the Hobart hotel like?
- Is Launceston guided on the final morning?
- Is the chairlift ride included?
- What happens if I cancel?
Key highlights you’ll actually feel
- Max 15 travelers keeps the vibe friendly and helps the guide tailor attention
- Mövenpick Hotel in Hobart gives you a central, stylish start
- Port Arthur gets a 3-hour guided visit so the story sticks (not just photos)
- Bay of Fires + St Helens oysters delivers both scenery and real local flavor
- Pyengana Dairy includes a cheese tasting and robotic dairy viewing
- Penguin spotting near Bicheno Blowhole adds a wild, night-on-the-rocks moment
Why This Hobart to Bay of Fires Route Fits Five Days
If you only have a few days in Tasmania, the east coast is the best “high-impact” choice. This tour keeps you moving in the right direction: from Hobart up the coastline, through the Port Arthur region, then to the dramatic orange-and-white coast around the Bay of Fires.
What makes the route work is the balance between big landmarks and small nature moments. You get sweep-the-eyes views (Mount Wellington and Tasman National Park), then you swap in history and food (Port Arthur, Richmond Bridge, cheese, wine, oysters). It’s not all scenic overlooks. There’s also enough structure that a rainy day or a chilly wind doesn’t wreck your momentum.
You can also read our reviews of more tours and experiences in Hobart

Mövenpick Hobart: A Central Start That Saves You Time
Day 1 is built for arrival. You can get into Hobart at your leisure, then check in to the Mövenpick Hotel from 1pm. That matters more than it sounds. When your hotel is centrally located, you don’t burn your first afternoon figuring out transport or wasting time on “where do we go now” logistics.
The hotel also sets you up for an early next day. Starting the tour at 8:30am means you’ll be glad you’re already close to the action instead of scrambling across town.
Day 2 From Hobart Sights to Tasman National Park’s Tasman’s Arch
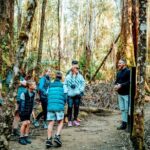
Day 2 is a full “eastward launch” day. You’ll begin in Hobart with a mix of history and photo stops, then work your way out toward the Tasman National Park coastline.
You start with Constitution Dock, plus the Mawsons Hut replica museum area. It’s the kind of stop that’s short but memorable—statues tied to the first South Pole expedition and a sense of how Hobart connects to the wider Australian story. Nearby, Salamanca Square and the Salamanca & Battery Point areas bring you back to the waterfront character of the city.
After that, the day leans harder into Tasmania’s convict history. You’ll pass by a major site linked to women convicts, including the imposing walls that still show how strict and guarded life was. Then the route pivots into breweries and views: Cascade Brewery is a quick stop for photos and stories behind Tasmania’s brewing scene.
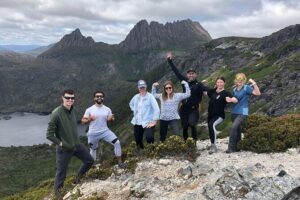
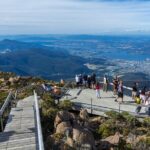
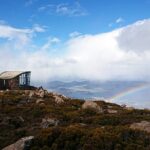
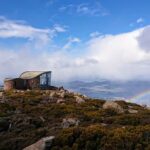
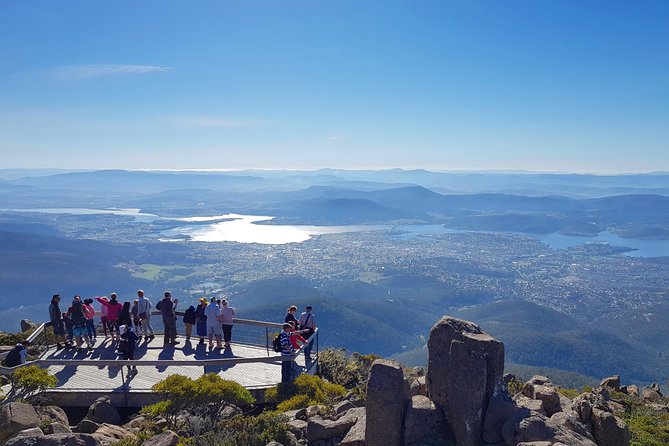
Next comes the big view payoff: Mount Wellington (1,275m). This is where you get panoramic city views and that classic “so this is why people come back” perspective.
From there you cross the Tasman Bridge to the eastern shore, and the tour shifts into heritage-road-trip mode. You’ll stop at Richmond Bridge, noted as Australia’s oldest still-in-use bridge, built by convicts in 1823. You’ll also check out Denison Canal, a shortcut for merchant and trade vessels heading toward Hobart—small detail, big “how did they do that” factor.
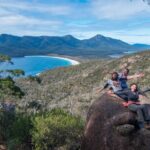
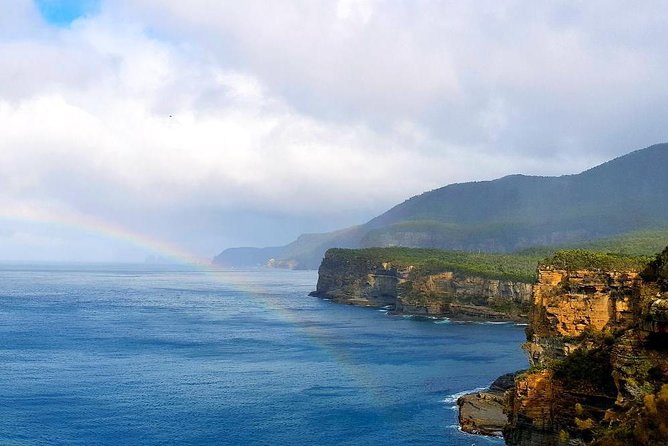
The later part of the day turns into coastal highlights and geology. You’ll have an afternoon tea and coffee break at the Pirates Bay / Eaglehawk Neck lookout area, then walk the famous tessellated pavement—an unusual rock pattern right by the waterline. From there, Tasman National Park delivers its main stage moment: Tasman’s Arch. You’ll walk over the arch for another lookout and the kind of coastal cliff views that make you stop thinking about the itinerary and start just looking.
One thing to plan for: this is a lot of “move, look, learn, move again” in one day. Wear shoes you’re happy to walk in, because the stops aren’t only driving-by.
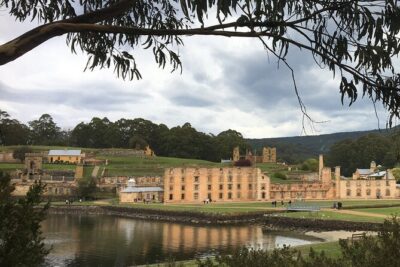
Day 3 Port Arthur’s 3-Hour Guided Tour and the Coastline Around It
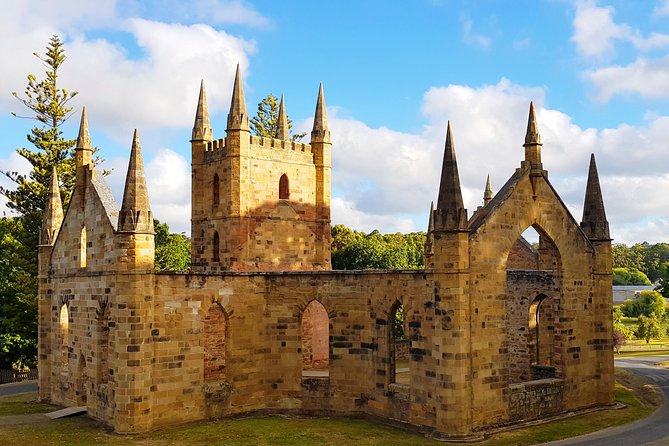
Day 3 is the history anchor. Port Arthur Historic Site gets a personally guided 3-hour tour, which is exactly the right length. It’s long enough to understand the convict transportation story and how the site functioned, but not so long that everyone turns into autopilot.
The biggest value here is the guidance style: you’re not just reading plaques. You’re getting stories across multiple buildings and scenic vantage points. If you care about Tasmania’s darker chapters, this is the heart of the itinerary.
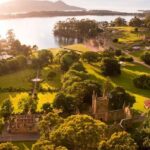
After Port Arthur, the day stays playful. You stop for hand-made samples at Federation Artisan Chocolate, then you head to the Port Arthur Lavender area. The lavender farm is a nice change of pace—pink and purple blooms, plus a gift shop and on-site snacks or coffee. Even if you’re not a lavender person, it’s a good break from “walls and history” mode.
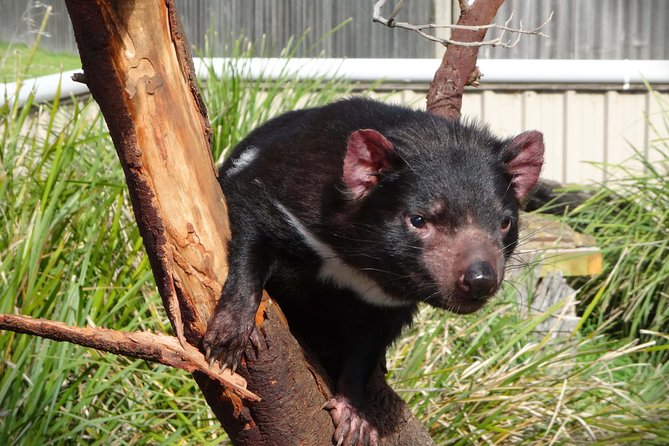
Next, the tour passes by Maria Island and gives you coastal views from Raspin’s Beach near Orford. You’ll learn about the convict settlement history there and the mention of devil populations being among the healthiest in the state. It’s not a full island excursion here, but it’s enough to make the island feel real.
Then you get two quirky coastal stops. Spiky Bridge is exactly what it sounds like: rows of spiky rock formations linked to convict-era building in the 1840s. After that, you head to Spiky Beach for an afternoon vibe shift, still tied to the coastline theme.
The evening is the wild-card moment. At Bicheno Blowhole, you’ll join a fully guided penguin spotting adventure near the rocks just by the blowhole. It’s a big contrast to Port Arthur: instead of stone structures and strict rules, you’re watching small animals in a natural, coastal setting.
Day 4 Bay of Fires, Oysters in St Helens, and the Robotic Dairy Stop
If Day 3 is about history, Day 4 is about nature and food in equal measure. You start again at Bicheno Blowhole during daylight, when the water can shoot 25+ feet into the air. Even when it doesn’t go dramatic, it’s still one of those coastal features that makes you feel the power of the ocean.
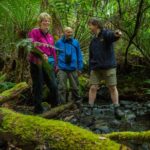
Then you’ll head to East Coast Natureworld for a fully guided 2-hour visit. It’s an animal sanctuary, with native animals rescued from the wild or bred on-site. This is a nice mid-day structure because it’s guided and paced, not just wandering.
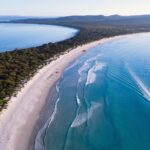
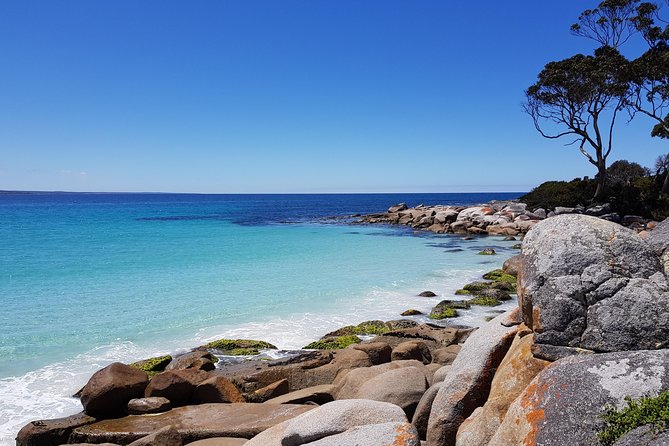
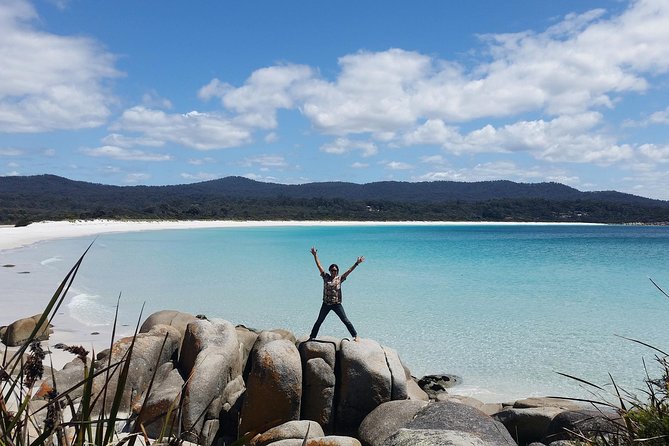
After lunch, the scenery takes center stage: Bay of Fires. You’ll spend time exploring the coast where white sand, ice-blue water, and red/orange rocks create that unforgettable color contrast. This is also a stop where photos feel less like work and more like play.
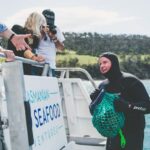
In St Helens, the tastings turn into something you can’t fake. You’ll have fresh oyster tastings from Lease 65 Oyster Farm. The Pacific oysters are described as coming straight from the local operation, and this is where you’ll taste how different “fresh” really is.
Next up is Pyengana Dairy, a stop built around cheese tasting and a look behind the scenes at a fully automated robotic dairy. Even if you don’t care about machinery, watching how production works adds context. And if you do care, this is one of the rare tours where the food stop includes an explanation, not just samples.
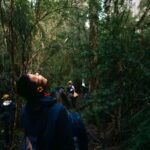
As you keep rolling, there’s a scenic drive through temperate rainforest territory, with giant myrtle trees and man ferns. It breaks up the coast-and-history rhythm. Then you finish the day with coffee at the Legerwood Memorial Tree Carvings, chainsaw-carved war memorial trees tied to local men who gave their lives in the Great War.


Day 5 Launceston: A Free Morning to Reset
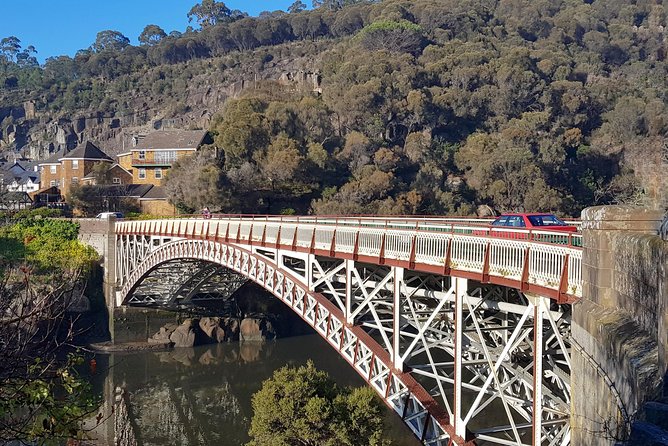
On Day 5, your package shifts into a more relaxed mode. Launceston is your final morning, and it’s unguided, with about 3 hours to do what you want.
You’ll check out by 11am from your hotel, and then you can rest or head out to the city mall area and nearby parklands, a few minutes walk away. This unstructured block is a quiet reward after the previous days’ pace. It’s also a good chance to buy anything you skipped, like extra cheese, a small bag of chocolates, or a souvenir you didn’t want to carry during the busy legs.
Price and Value: What $1,574.35 Buys You Here
At $1,574.35 per person, this is not a budget trip. But it does include the stuff that usually blows up the cost when you DIY: accommodation, most meals, all attraction entry fees, and national park passes and fees. On top of that, you’re also getting structured tastings—wine, chocolate, cheese, and oysters.
When I look at value for a tour like this, I focus on three things:
- Guide time + logistics: driving between dispersed sights, plus narration at the stops, saves your own energy.
- Admissions and transport planning: entrance fees and national park access can add up fast.
- Food you’d otherwise have to hunt down: wine tastings, chocolate, cheese, and oysters are built into the day, not tacked on at random.
The tour also caps at 15 travelers, which is a major value driver. Smaller groups mean better attention at the stops, and it’s easier to ask questions without feeling rushed.
One note: the chairlift ride across the gorge is possible for an extra $15 per person, but it’s not included. If you think you’ll want it, factor it into your budget.
Who This Tour Suits Best (and Who Might Want Something Different)
This is a strong match if you want a guided “greatest hits” east coast run without doing research all day. It’s also a good solo option. One of the standout points from the operator’s own guidance style is that solo travelers are common, and small groups make socializing easier.
You’ll also like it if you’re the kind of traveler who enjoys learning as you go—convict history, geology like Tasman’s Arch, and how the food story connects to where it’s made.
You might want a slower or longer trip if you hate early starts or need more downtime. Day 2 and Day 4 are long and busy, and several stops are timed for photos and quick exploration rather than long wandering.
A Few Practical Tips Before You Go
- Plan for walking and uneven terrain at lookouts and coastal spots. Shoes matter more than fashion.
- Bring a layer. The coast can be cooler and windier than Hobart city temperatures.
- Expect tastings to take up a chunk of time. That’s the point here, so don’t schedule your own long detours.
- Keep an eye on what’s included vs optional. For example, the chairlift is extra.
Should You Book This 5-Day East Coast Tour?
If your goal is to see Tasmania’s east coast highlights in five days, I’d book it. The value comes from the combination of guided history (Port Arthur), signature scenery (Mount Wellington, Tasman’s Arch, Bay of Fires), and built-in local food tastings (wine, chocolate, cheese, oysters). Plus, the small-group size and the central Hobart hotel start make it feel organized without being stiff.
If you’re the type who wants more free time at each stop, you might be happier with a longer independent plan. But if you want the island’s “big moments” handled for you, this one earns its place.
FAQ
What time does the tour start?
It starts at 8:30am.
Is pickup offered?
Yes, pickup is offered.
How big is the group?
The tour has a maximum of 15 travelers.
What’s included for meals?
Breakfast is included (4 breakfasts) and lunch is included (3 lunches). Hotels and most meals are also included.
What tastings are included?
You’ll have tasting samples of wine, chocolate, cheese, and oysters.
Are entry fees and park passes included?
Yes. All attraction entry fees are included, along with national parks passes and fees.
What is the Hobart hotel like?
Your first night includes accommodation at the Mövenpick Hotel in Hobart, with check-in available from 1pm. It’s centrally located.
Is Launceston guided on the final morning?
No. Day 5 in Launceston is unguided, with about 3 hours of free time.
Is the chairlift ride included?
No. A chairlift ride across the gorge is possible for $15 per person and is not included.
What happens if I cancel?
The experience is non-refundable and cannot be changed for any reason. If you cancel or ask for an amendment, you won’t get a refund.