REVIEW · HOBART
Richmond and Wine Tour
Book on Viator →Operated by Boutique Wine Tours Tasmania · Bookable on Viator
First you hit Tasmania’s wine trails. Then you stroll colonial Richmond. This day trip stands out because it pairs small-group pacing with real time in both wine country and Australia’s oldest in-use bridge town. I especially liked the way the tour mixes tastings with proper breaks, and how hosts like Darren and Jackie at Puddleduck (and the driver-guide Peter) keep the day feeling friendly and organized, not rushed. The only thing to consider is that with multiple cellar doors and included food, it’s an easy day to overdo the alcohol unless you eat early and pace yourself.
You also get a logistics win: round-trip transport means you can focus on enjoying instead of mapping, parking, and playing designated driver. The group size caps at 13, so you’ll actually talk to people on the ride without feeling like you’re in a long bus tour. One more practical caution: the schedule is tight enough that you’ll want to be ready when the group is called—great for fun, less great if you hate being on a timetable.
In This Review
- Key highlights worth caring about
- Richmond and Wine Tour: what the day feels like
- Getting started in Hobart with Peter and a smooth schedule
- Stop 1: Puddleduck Wines and lunch with Darren and Jackie
- Stop 2: Pooley Wines at heritage-listed Belmont Lodge
- Stop 3: Coal Valley Vineyard for views and a cosy cellar door
- Stop 4: Richmond Bridge, Australia’s oldest bridge still in use
- Stop 5: Richmond town time—colonial buildings, boutiques, and the Gaol
- Stop 6: The Wicked Cheese Co tastings and a break from wine
- Price and value: does $157.08 per person make sense?
- Logistics, comfort, and how to enjoy it without stress
- Who should book this tour—and who might not love it
- Should you book this Richmond and Wine Tour from Hobart?
- FAQ
- FAQ
- What time does the Richmond and Wine Tour start?
- Where is the meeting point?
- How long is the tour?
- How big is the group?
- How do I get my ticket?
- What’s included in the tour?
- Is Richmond Bridge part of the itinerary?
- Can I bring a service animal?
- Where does the tour end?
Key highlights worth caring about
- Small group (max 13) keeps the day sociable without feeling chaotic
- Round-trip Hobart transport so you can drink without doing the driving math
- Puddleduck Wines includes lunch platter, plus wine hosted by Darren and Jackie
- Richmond Bridge photo stop at the oldest bridge still in use in Australia
- The Wicked Cheese Co tastings bring a non-wine flavor reset near Richmond
- Cellar door rhythm of back-to-back tastings with short, manageable stops
Richmond and Wine Tour: what the day feels like
This tour is basically two experiences stitched together cleanly: a wine day in a lesser-known part of Tasmania, and a colonial town walk with landmarks you can’t get from a postcard.
You start in Hobart at 9:30 am from the Tasmanian Travel & Information Centre on Davey Street. From there, it’s a series of short rides and tastings that add up to a full day without turning into a marathon. You’ll be on the move enough to see a lot, but you won’t be stuck in one long stretch where your legs go numb and your group morale disappears.
The small-group size really matters here. When you’re in a group of up to 13, the driver-guide has time to explain what you’re looking at and still keep the timing tight between stops. That’s how you get a day that feels like you’re hanging out with good company, not just being dropped at a door and pointed toward a tasting counter.
Also: the tour uses a mobile ticket, so you’re not hunting for print-outs at the last second.
You can also read our reviews of more wine tours in Hobart


Getting started in Hobart with Peter and a smooth schedule
The meeting point is central in Hobart, so you’re not doing extra taxi rides just to start the day. You’ll get on the bus and head out, and that first stretch sets expectations: this is a guided day with enough structure to keep you from wasting time, but not so strict that you feel herded.
One theme that comes through from the day’s experiences is the guide role. The driver-guide Peter is specifically mentioned for being excellent—keeping things upbeat and informative, and helping the whole schedule run with minimal waiting. If you’re the kind of traveler who loves local context (why things were built, what makes a building stand out, where the region’s wine character comes from), you’ll likely enjoy how the day is framed as you go.
And because you’re in transport for the day, you don’t have to solve the designated-driver puzzle. That alone can be worth it when you’re spending the day drinking tastings.
Practical tip: if you’re tempted to skip breakfast, don’t. One review summed it up bluntly: eat something early, because by mid-afternoon you’ll want the fuel.
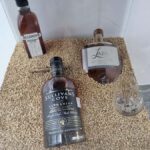
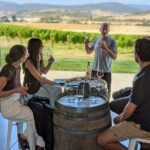
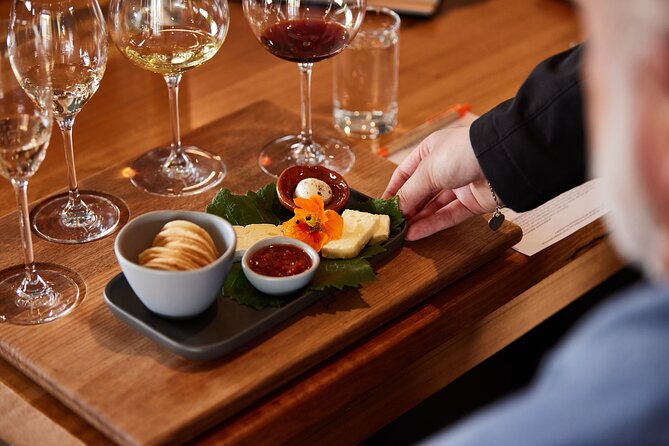
Stop 1: Puddleduck Wines and lunch with Darren and Jackie
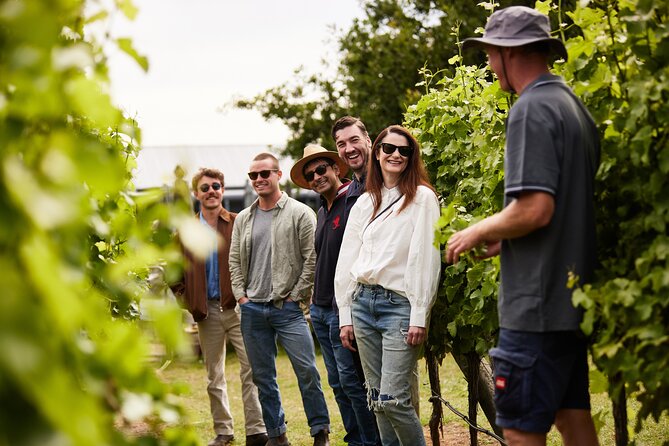
Your first wine stop is Puddleduck Wines. You get a full one hour here, which is a big deal. Many wine tours feel like they’re designed for quick sips; this one gives you time to talk through the wines, not just rush a checklist.
You’ll be welcomed by Darren and Jackie, and that matters because cellar doors feel different depending on the host. The vibe here is warm and personal—good for first-timers who want guidance and good for regular wine people who like learning the story behind what they’re drinking.
The other reason Puddleduck is a strong start: you also get a lunch platter included. This is how the tour protects your enjoyment later. Lunch early means you can taste without getting steamrolled by the schedule. It also helps you pace the alcohol if you decide to buy a bottle or two.
What to expect:
- A tasting experience with real hospitality
- Enough time to compare wines and ask questions
- A lunch platter that gives you something solid in your stomach
What to consider:
- If you’re trying to stay stone-cold sober, this stop is still alcohol-forward. Plan water and pace your pours.
Stop 2: Pooley Wines at heritage-listed Belmont Lodge
Next up is Pooley Wines for 30 minutes of cellar door tastings. This stop is shorter than Puddleduck, but it’s still enough time to sample and pick up a couple of favorites.
The setting is part of the appeal: Pooley’s tastings happen in the heritage-listed Belmont Lodge. That’s the kind of detail that changes the feel of a winery. Instead of tasting in a plain modern room, you’re tasting in a historic context, which makes even a quick stop more memorable.
Why this stop works:
- You get a taste of the region’s style without sacrificing the day
- The heritage setting adds character without needing extra time
- The schedule keeps you moving toward Richmond while you still have energy
Possible drawback:
- If you fall in love with one wine and want to go deep, 30 minutes can feel just a bit short. This is a “tasting with momentum” stop.
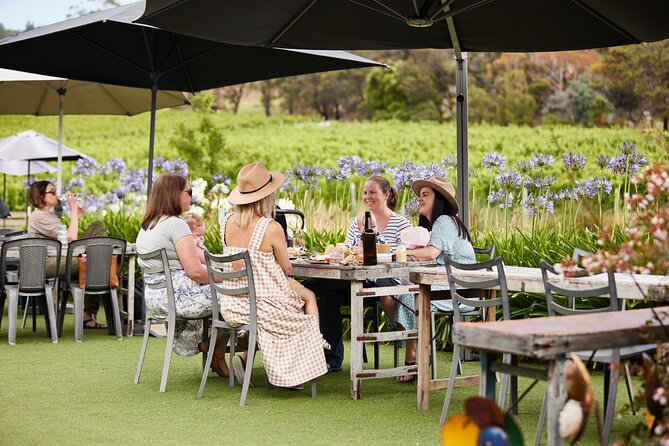
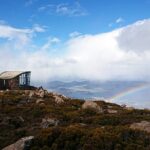
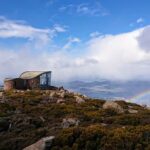
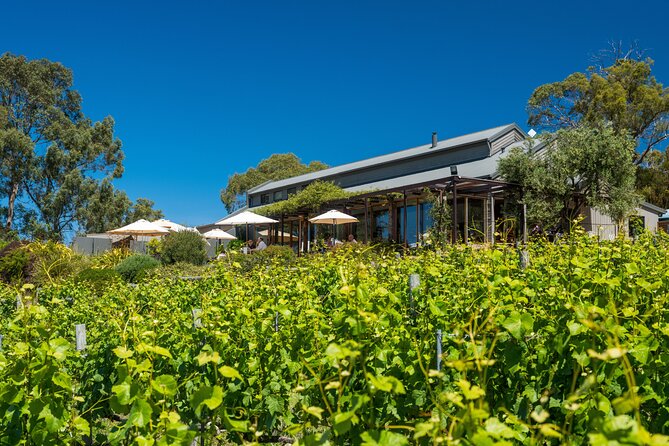
Stop 3: Coal Valley Vineyard for views and a cosy cellar door
Coal Valley Vineyard is another 30-minute tasting window, but with a different selling point: a cosy cellar door paired with stunning vistas.
This is where the day balances out. After a couple of wine stops, the change of scenery gives your brain a reset. It’s also a nice photo moment if you like taking landscape shots, because the winery view is described as a perfect backdrop for tasting.
Why it fits the overall day:
- You’re not just tasting indoors; you’re tasting with atmosphere
- The stop length keeps you from feeling stuck waiting around
- The views can make the tasting experience feel more “place-based,” not just product-based
Consideration:
- If you’re sensitive to wind or cold during photo breaks (depending on season), dress for comfort. You’ll likely want a layer for the viewpoints.


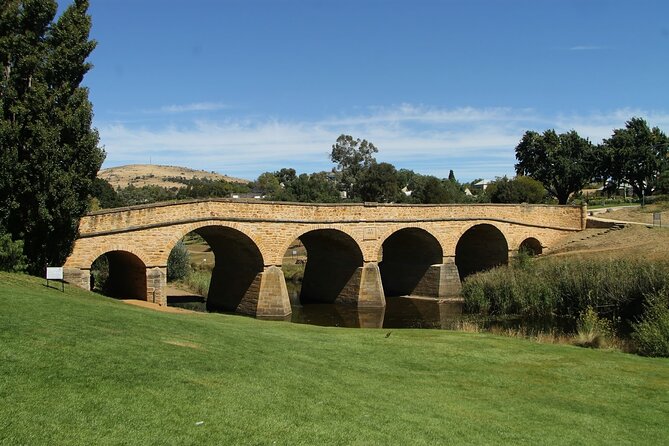
Stop 4: Richmond Bridge, Australia’s oldest bridge still in use
Then it’s off to Richmond, starting with the Richmond Bridge. You get a 10-minute stop here, and it’s specifically one of the iconic views in Tasmania.
The headline fact is impressive: it’s the oldest bridge still in use in Australia. Even if you’re not a hardcore history person, it’s the kind of landmark you can appreciate instantly. You can look at it, take a photo, and understand why it’s still functioning today.
The practical value of a short bridge stop:
- It gives you a quick “wow” moment without hijacking the schedule
- It’s an easy photo stop even if the group keeps moving
- You’re positioned close to the rest of the Richmond experience
If you love photos, this is one of your best time slots. 10 minutes disappears fast, so decide your photo angles quickly.
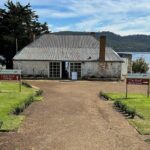
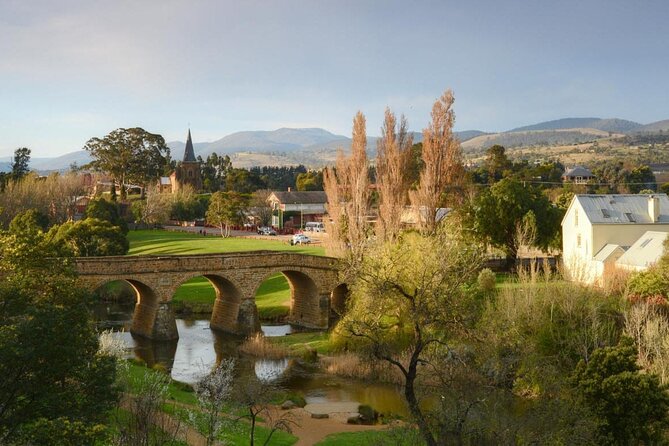
Stop 5: Richmond town time—colonial buildings, boutiques, and the Gaol
Now you get the real town experience: about an hour in Richmond. This is where the day earns its second half.
Richmond is known for having some of Australia’s oldest colonial buildings, including the Richmond Bridge and Gaol. The Gaol predates the more famous Port Arthur site, which gives you an unexpected historical perspective if your Tasmania plans were only focused on the big-name attractions.
This hour also includes time to wander the streets lined with shops and unique boutiques. It’s a nice pace—slow enough to browse, short enough that you’re not worn out before the last stop.
What you can do in that hour:
- Stroll the colonial streets and take in the buildings
- Browse boutiques if that’s your thing
- Plan a casual drink or sweet treat if you want a break from tasting
A small scheduling note: the town time is free time, so you’ll want to pay attention to the meeting point and re-group timing. That’s the difference between a relaxed walk and a slightly stressful scramble.
Stop 6: The Wicked Cheese Co tastings and a break from wine
The final stop is The Wicked Cheese Co. You’ll have tastings included, and this is where the day turns into something fun beyond wine.
Cheese is a smart counterbalance. Wine can get heady by the end of a tour, so a cheese stop gives you variety in flavors and textures while still staying in the same “pairing” mindset.
This is also described as award-winning boutique cheese crafted near Richmond. The tasting experience is short—about 10 minutes—but it’s designed to be a payoff moment. If you like food-focused souvenirs, cheese is a great one to bring home because it feels specific to the region.
One more practical advantage: if you didn’t get enough to eat earlier, this stop can help you finish the day more comfortably. (Still, don’t rely on it—your best protection is having lunch at Puddleduck.)
Price and value: does $157.08 per person make sense?
At $157.08 per person for about 7.5 hours, this tour is priced like a proper small-group day trip—not a cheap hop-on hop-off situation.
Here’s why it can feel like good value:
- Round-trip transport from Hobart removes the cost and hassle of driving
- Multiple included tasting stops mean you’re paying for guidance and access, not just scenery
- Lunch platter included at the first winery reduces your out-of-pocket food cost
- You get a full Richmond walk window plus the Richmond Bridge photo stop
- Cheese tastings included add another local food experience without requiring extra ticket purchases
What could make it feel less worth it?
- If you’re the type who only likes a small number of sips and hates structured timing, you might want a different style of tour.
- If you don’t drink much at all, the schedule is still designed for tasting days, so you’re paying for the wine-forward format.
My advice: this is a good value pick if you want a complete day—wine, town, and local food—done for you with a guide.
Logistics, comfort, and how to enjoy it without stress
This tour runs with a tight but friendly timeline. Most of the stops are around 30 minutes, so you should show up ready to taste and move.
A few comfort notes that matter on a day like this:
- Transportation is described as comfortable and air-conditioned, which is a big win for a long day in Tasmania
- Expect short rides between stops, not long isolated segments
- Dress for changing conditions, especially if you’ll be stepping outside at viewpoints or around the bridge area
Alcohol pacing tips (from real-world experience, not theory):
- Eat first. Breakfast helps a lot.
- Bring water. Even if you don’t love it during tastings, it makes the later stops more enjoyable.
- If you plan to buy wine, keep an eye on how much you’re carrying; your day ends back in Hobart, and you don’t want to fight bags.
Also, service animals are allowed, and the tour is near public transportation—useful if you’re mixing plans in Hobart.
Who should book this tour—and who might not love it
This is a great fit if:
- You want wine and a real town walk in one day
- You like the small-group vibe with a guide who sets the tone
- You want to drink tastings without dealing with parking or a designated driver
- You enjoy food pairings like the cheese stop and included lunch platter
You might want to skip or choose a different option if:
- You prefer self-guided pacing and hate structured timing
- You only want one or two tastings and don’t want a full alcohol-forward schedule
- You’re traveling with a strict mobility limitation that requires slower stop-to-stop movement (the tour is mostly guided stops, though no specific limitations are stated)
Should you book this Richmond and Wine Tour from Hobart?
If you’re doing Tasmania from Hobart and want one day that delivers both local wine tastings and colonial Richmond wandering, this tour is worth serious consideration. The combination of included lunch platter at Puddleduck, a set rhythm of cellar doors, and the Richmond Bridge + town time makes it feel complete rather than “just another tasting day.”
Book it if you want convenience, a friendly small-group atmosphere, and a guide like Peter who keeps the day moving well. Consider another style of day trip if you’re not into multiple tastings or you want lots of long, unscheduled time.
FAQ
FAQ
What time does the Richmond and Wine Tour start?
The tour starts at 9:30 am from the Tasmanian Travel & Information Centre in Hobart.
Where is the meeting point?
You meet at Tasmanian Travel & Information Centre, 20 Davey St, Hobart TAS 7000, Australia.
How long is the tour?
The duration is about 7 hours 30 minutes.
How big is the group?
This tour has a maximum of 13 travelers.
How do I get my ticket?
You’ll receive a mobile ticket.
What’s included in the tour?
Wine tastings at the stops are included, along with a lunch platter at Puddleduck Wines and tastings at The Wicked Cheese Co. The Richmond Bridge stop is also included for viewing/photo time.
Is Richmond Bridge part of the itinerary?
Yes. You get a dedicated stop at Richmond Bridge for about 10 minutes.
Can I bring a service animal?
Yes, service animals are allowed.
Where does the tour end?
It ends back at the meeting point (the same place you start from in Hobart).

![Port Arthur Historic Site [official] - The MV Marana harbor cruise: short ride, strong payoff](https://m.hobartdaily.com/wp-content/uploads/port-arthur-historic-site-official-400x267.jpg)